

Econt shipping module installation and settings
Step 1
Make sure your WordPress e-shop has the WooCommerce plugin installed.
We recommend having the latest version installed.
Before installing the plugin:
From the WordPress admin panel, check the following WooCommerce settings and, if necessary, correct them according to the instructions below:
- In WooCommerce -> Настройки -> Основни -> Местоположения за доставяне, the option Изключване на доставките и изчисленията за доставка must be disabled
- In WooCommerce -> Настройки -> Основни -> Местоположение по подразбиране for the customer, we recommend enabling the option Седалище на магазина
- In WooCommerce -> Настройки -> Основни -> Опции за валута -> Валута select български лев
- In WooCommerce -> Настройки -> Основни -> Опции за валута -> Позиция на символа за валута select Дясно
- In WooCommerce -> Настройки -> Основни -> Опции за валута -> Разделител на хилядите select , (comma)
- In WooCommerce -> Настройки -> Основни -> Опции за валута -> Десетичен знак select . (decimal point)
- In WooCommerce -> Настройки -> Основни -> Опции за валута -> Брой на десетиците select 2
– Check if the hosting server you use meets the system requirements of the plugin:
- PHP 5.3.x or newer
- MySQL 5.0.x or newer
- cURL PHP extension
- SimpleXML PHP extension
- max_execution_time >=3600
- max_input_time >=3600
- memory_limit >=512M
- mysql wait_timeout >=3600
- mysql max_allowed_packet >=32M
- server httpd_can_network_connect=true
Download the installation files of the Econt Express shipping plugin for WooCommerce from here
Step 2
You can install the module in two ways:
Method 1:
- Log into the admin panel of your WordPress e-shop.
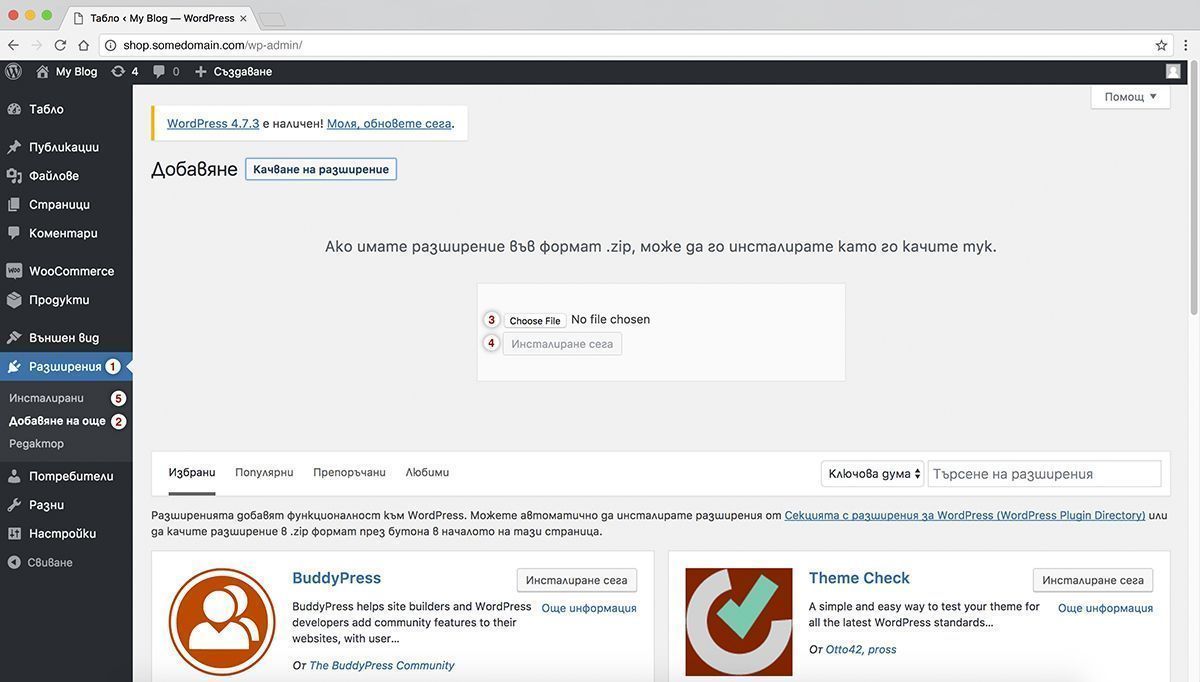
- Go to menu Разширения -> Добавяне на още (Plugins -> Add New).
- Press the Browse button and select the archive file woocommerce-econt.zip, which you downloaded in Step 1.
- Press the Инсталирай (Install) button.
- Go to section Инсталирани разширения (Installed Plugins). A new page will open.
- On line Woo Commerce Еконт Експрес Shipping plugin, press the Активирай button.
Method 2:
- Extract the woocommerce-econt.zip file, which you downloaded in Step 1.
- Upload the extracted files to the directory /wp-content/plugins of your e-shop using an FTP client (e.g. FileZilla) or any other method of file transfer.
- In the admin panel of your WordPress e-shop, go to menu Разширения -> Инсталирани (Plugins -> Installed Plugins).
- On line Woo Commerce Еконт Експрес Shipping plugin, press the Активирай button.
Step 3
The module is already installed and enabled. Now you have to configure it.
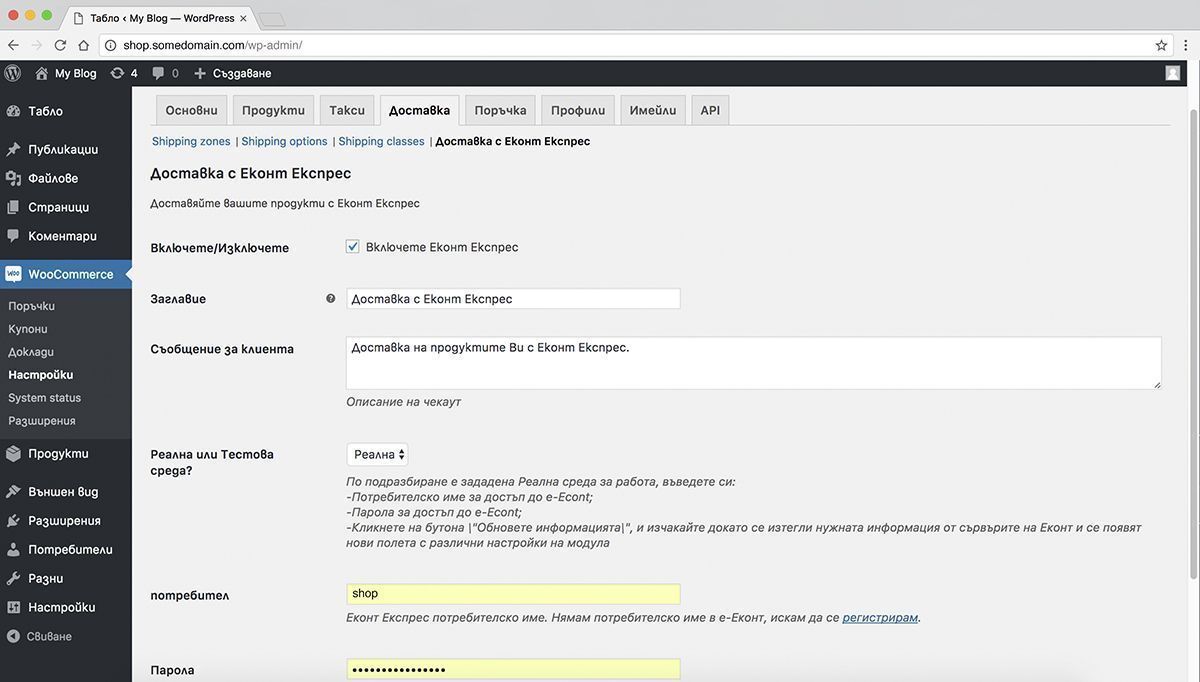
- From the admin panel of your e-shop, go to menu WooCommerce -> Настройки -> Доставка.
- Check the box in front of Включете Еконт Експрес.Fill in the fields as follows:In the Заглавие field, select Доставка с Еконт.In the Съобщение field, enter a short description of the payment method (e.g. cash on delivery, free shipping for orders over BGN 50.00, etc.).In the Реална или Тестова среда field, select Реална. If you only want to test the system, select test.Enter your username and password for e-Econt.
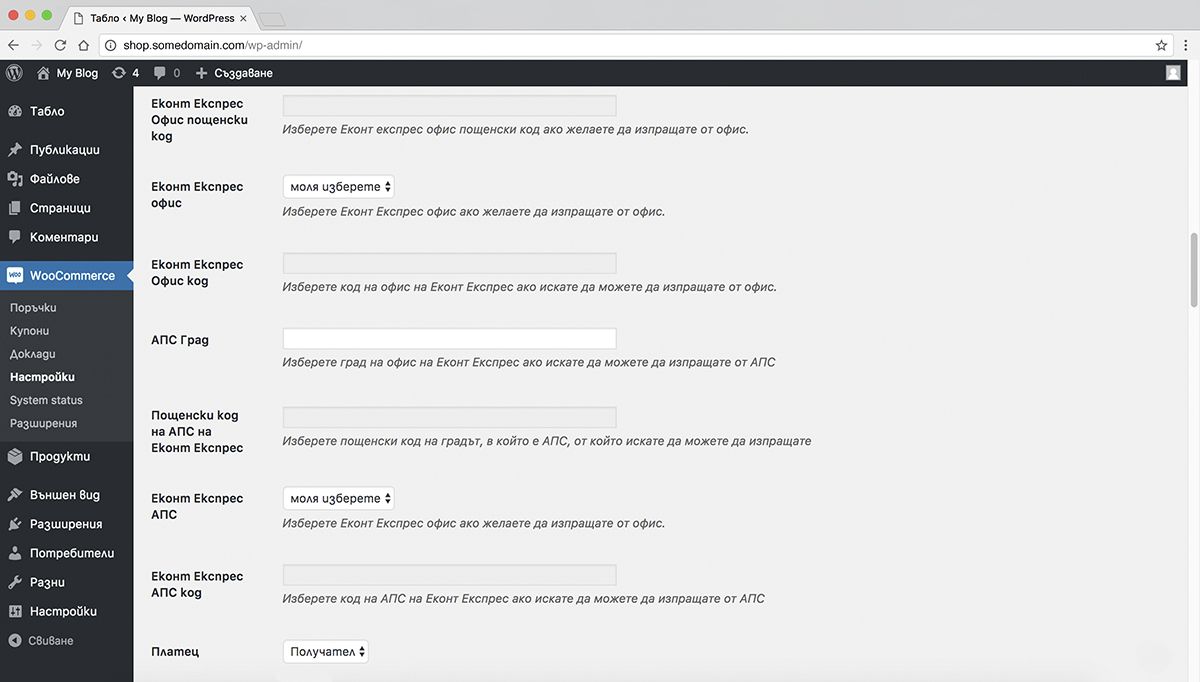
- Scroll down to the end of the page and press the Запазване на промените button.
- Go back to line Обнови данни and press the Обновете информацията button.
- Wait for a few minutes without pressing anything else on the screen. The Woocommerce Econt Express plugin will synchronise the database for cities, offices, city quarters and streets with our server.
- On line Синхронизиране на профила, select the Обновете информацията button.
Step 4

- Complete the fields in the same way as they are in your Econt profile:
– Company
– Name
– Telephone
Step 5
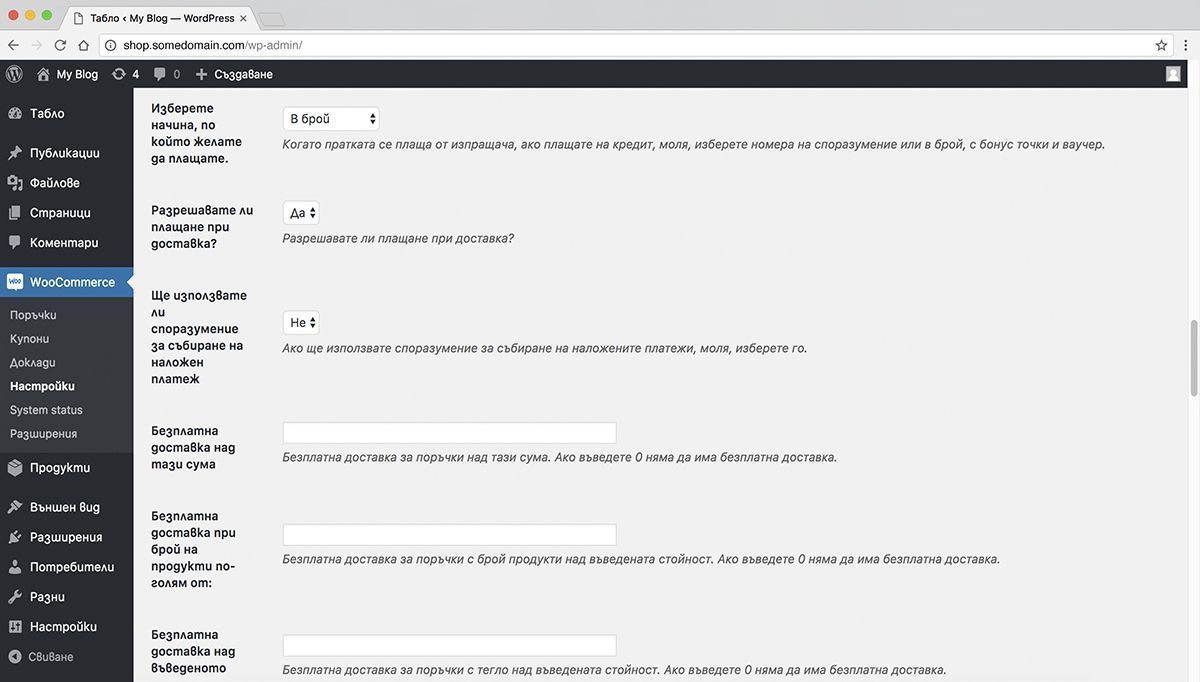
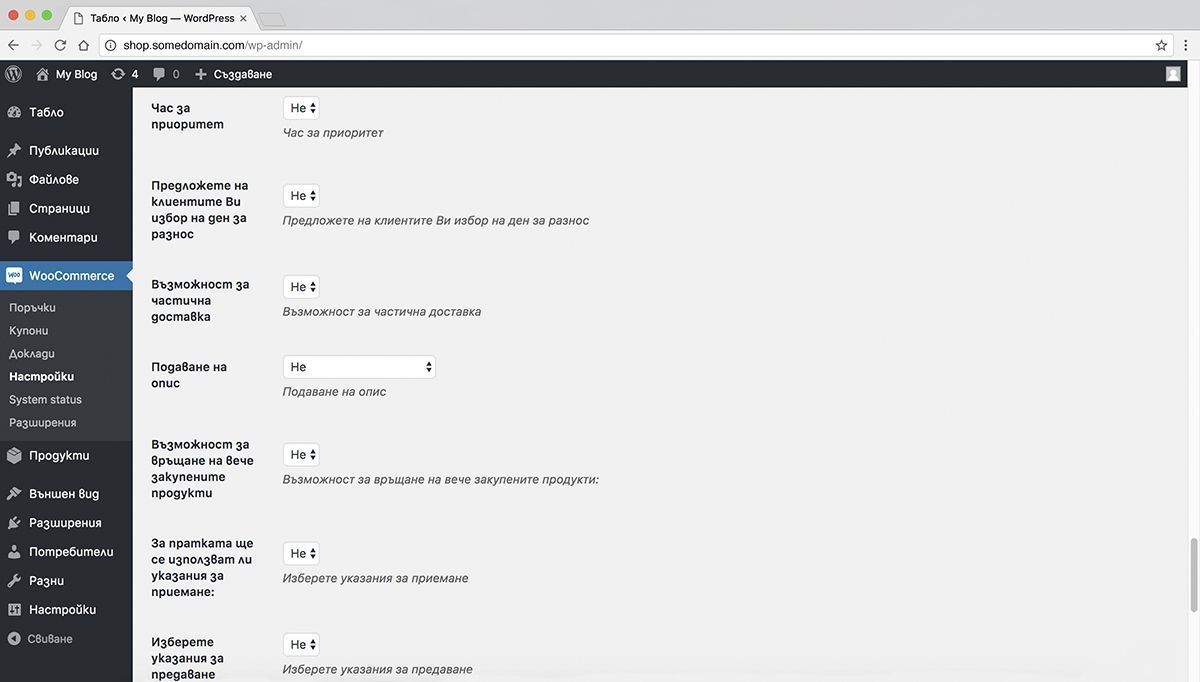
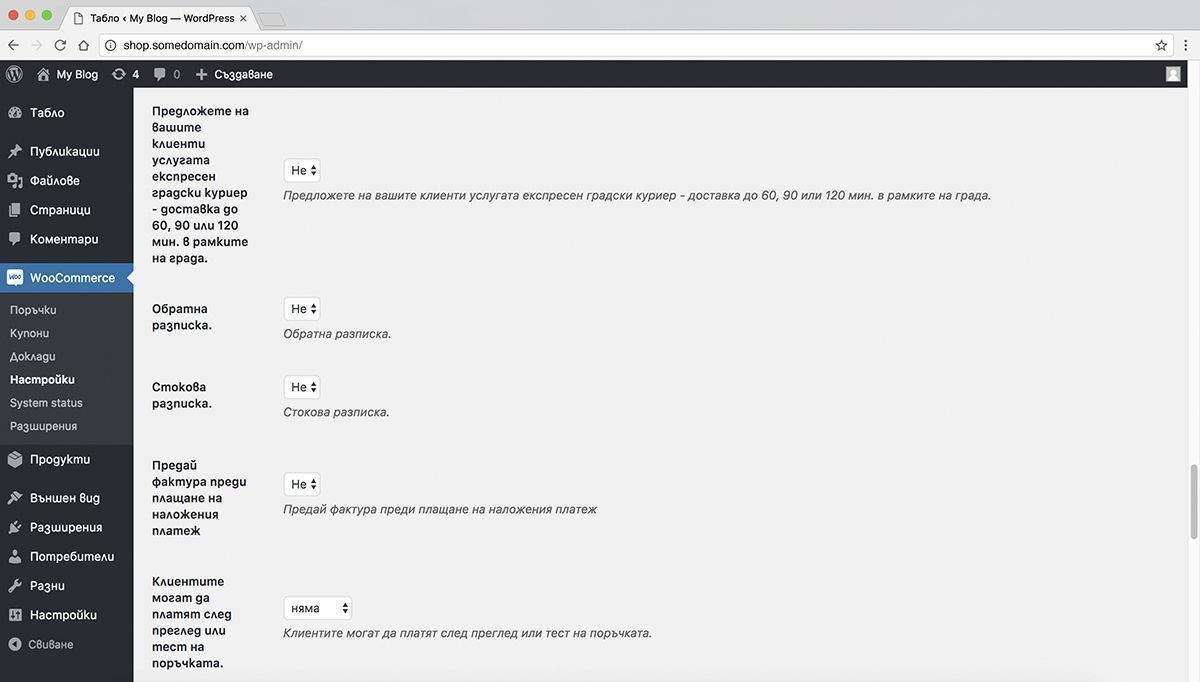
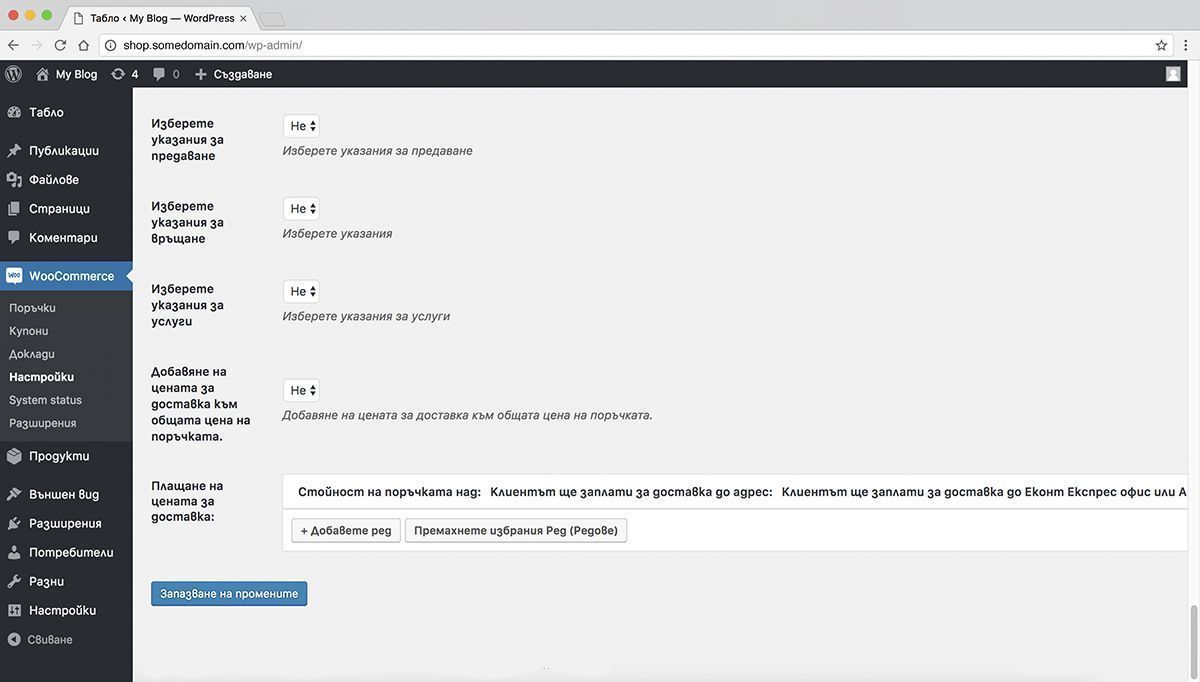
- Complete the fields until the end of the screen as you like according to the needs of your e-shop.
- Press the Запазване на промените button at the bottom of the page.
With this last step your e-shop from WordPress has been fully integrated with Econt.


